I got my Ham license (KJ7BIH) at age 71 in August of 2018 and quickly upgraded to Extra class with a VE certification. I’ve been building computers since 1976 and have been tinkering with CB and radios for about sixty years. Along the way I learned a few things that I would like to share…
Acessing Local Repeaters
I hang out on a number of Ham radio Facebook pages. One of the most common questions is “I can’t get access to a local repeater.” Here are some tips that might help.
* Can’t hear a repeater? Assuming the repeater is active, make sure the Radio is tuned to the correct frequency. In my area, where the repeaters are quite active, there are also long periods of time where there is no one using them. I suggest programming several of the repeaters in your area and scanning between them periodically to see when there is activity.
To listen to a repeater, you must tune your radio to the repeater’s transmit (or downlink) frequency. This does not require a ham license. Anyone can listen to ham radio transmissions at any time on any band or frequency.,
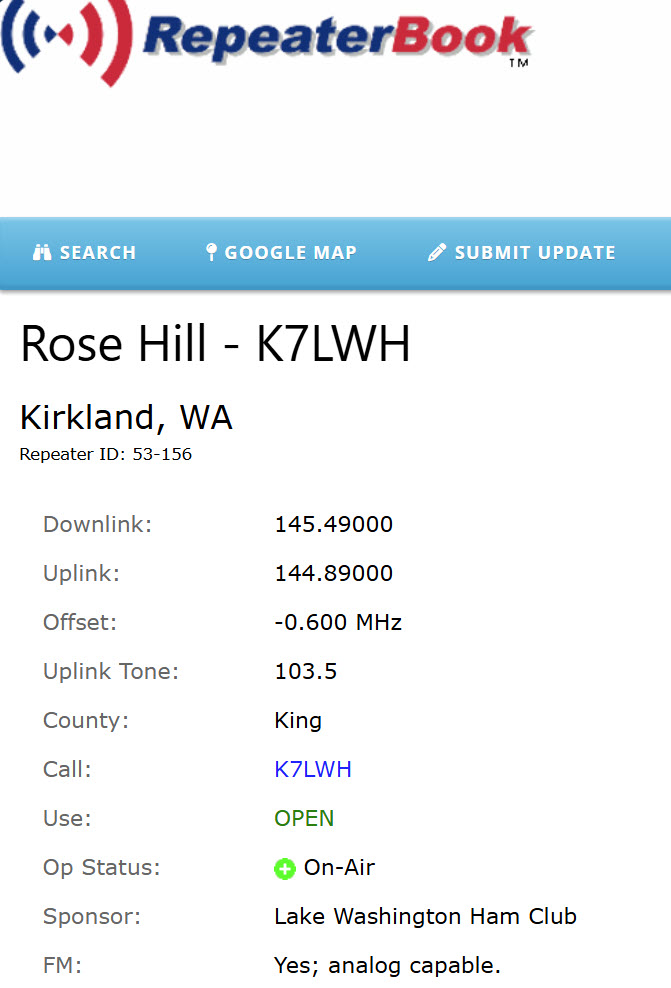
If you want to transmit to the repeater, you must have a valid ham radio license. First, you’ll need to determine the repeater’s transmit frequency. These frequencies use RepeaterBook, an application which runs on your phone or computer. It uses a selected location to list all of the repeaters within a specified range and type. I just looked up one of the Lake Washington Ham Club repeaters using the RepeaterBook application. It shows the transmit (Downlink) frequency of 145.600 MHz and receive (Uplink) frequency of 144.890 MHz. Note that it also shows an offset of (-0.600 MHz).
In order for the repeater to hear your transmissions, you will also need to set (in this case), a CTSS or Uplink squelch tone of 103.5 Hz. If this tone is not heard by the repeater, it will ignore you. However, if the repeater does hear your transmission and the correct tone, it will reply back to you its courtesy tone. This might be a morse code call sign and/or a short phrase identifying the repeater and possibly other tones. Remember, you are not legally permitted to transmit on your radio until you have a valid FCC ham license.
Setting the correct transmit frequency is accomplished by programming your radio. This can be done manually, which requires you to read the manual, watch a YouTube video, or through programs like Rt Systems. I greatly prefer the latter. Shown below is the RT Systems application with the local repeaters pre-programmed so that I can upload them to my radio. In this case, it’s for my Yaesu FT-5D HT.

Other Tips:
- Even experienced hams have difficulty programming HT’s and other radios. I make this far easier by using the version of RT Systems that matches my radio. This makes programming as simple as filling in a spreadsheet. You can even import local repeater frequencies from the Internet and paste them into the program and then push them up to your radio. Once you have one radio programmed, it’s easy to cut copy and paste these settings into another RT Systems folder and transfer the settings to another radio.
- The radio may have insufficient power to reach the repeater. This only applies to transmitting to the repeater not to monitoring it.
- Many inexpensive radios have poor sensitivity which means that they are unable to pick out the RF signal being transmitted by the repeater and pick it out from the background noise.
- Most new handhelds have poor antennas. They usually come with what we call a “rubber duck.” For this reason, experienced hams purchase a high gain or at least a better antenna to use with their handhelds.
- Many new hams attempt to use their HT radios indoors or from inside vehicles. To solve this problem, I install a remote antenna outdoors. You can use either a magmount or a clip mount to attach your antenna to the rain gutters or to some other surface outside and run an antenna lead indoors to your radio.
- Consider that metal blocks RF. This means if you have a metal roof or siding, or even metal-clad insulation, you will not have much luck hearing radio transmissions indoors. This means you should test your new radio outdoors and away from buildings.
- Your home or neighborhood may also be generating QRM (man-made interference). This noise can be generated by AC power adapters, fluorescent or LED lights, or appliances as well as streetlights. It can completely overwhelm incoming RF signals from outside.
- Contact your local ham club and see if you can get an Elmer to come over and help set up your radio. If you’re in the Redmond WA area I would be glad to help.
Programming the Yaesu FT-3D
My first ham radio Handi-Talkie (HT) was a Yaesu FT-2D. On the first day., I discovered it was hard to program so it became a new challenge in my new hobby. I soon discovered that I needed a special cable (of course) and a software package unless I wanted to program the twenty or so (it turned out to be about 100) repeaters in the area manually.
I settled on the ADMS-11 Programmer available for download here. And yes, each radio requires a custom cable. When I gave my FT-2D to my daughter’s boyfriend (as an excuse to get the newly released FT-3D,) I had to get another cable, but the software was… nope, different. I was able to replicate the technique I used with the FT-2D and quickly got the FT-3D on the air.
NOTE: As a precaution, I show how to back up your current radio settings and frequencies to a memory card. I suggest you make a copy the entire SD-card or create a file with the ADMS-11 software and store it somewhere safe.
WARNING: Use these instructions at your own risk. It is entirely possible to overlay your radio’s memory and configuration settings.
Programming Using an SD Card
- Begin by preparing your SD-Card for use in the radio. If your card is already pre-formatted by the radio, proceed to step 3. With the FT-3D OFF, insert a suitable SD-memory card (32GB or smaller) into the memory slot located under the upper rubber seal near the top of the radio on the right side. The card is inserted with the gold contacts up. Do not expect to be able to save anything already on this memory card.
Note: SD cards cannot be any larger than 32GB.
2. Power on the FT-3D. Press and hold the DISP front-panel button to launch the initial menu.
3. If the SD Card has never been used before, press DISP to select SD CARD and then 4-FORMAT to initialize the card. Note, this clears the SD memory card and anything on it and lays down a special file structure accessible by the FT3D. Click OK twice when prompted to confirm the operation.
4. Wait for completion of the format operation. It will not work if the card is incompatible with the FT3D. You should not have to repeat this process again with this SD memory card.
5. At this point, you should probably save the current contents of the FT3D radio to the SD memory card. This gives you a primary backup that can be useful later. To do this, press and hold DISP. Choose SD-CARD, 1-BACKUP, 1-WRITE to SD, and OK twice to confirm.
6. Power off the FT3D and remove the SD card. Sure, it’s a good idea to make a backup copy of this SD memory card.
7. Check the readability of your newly formatted SD card by inserting it into an SD Card reader in your PC and inspecting the directory structure the Format and Save operations created. I like to rename the SD memory card to something recognizable as it defaults to “Removeable Media.” I named mine “FT3D SD” but this is an optional step.
8. We’re now ready to use the ADMS-11 software on your PC to specify your frequencies, repeaters, defaults, and all other settings. To do so, download and install the ADMS-11 from the Yaesu website for the FT3D. No, you can’t use the ADMS-11 software for other radios. Each version of the software is specifically designed for each model.
9. When the ADMS-11 application initializes for the first time, you begin with a clean spreadsheet with only default FT3D factory-set frequencies and settings showing. That may or may not be the configuration currently programmed in your FT3D radio, so you might want to synchronize the ADMS-11 software with the FT3D using the custom USB cable or perform the following steps to load the current configuration from the memory card you just formatted and loaded with the current FT3D frequencies and settings.
10. In the ADMS-11 application, choose Communications | Read Data from SD Card… . The first time, you might be prompted to point to the location of the SD Card. Afterward, this is handled automatically. Once completed, the ADMS-11 application spreadsheet will be loaded with the radio’s configuration—you are now in sync.
11. At this point you can enter the frequencies and settings you wish to change and use the application’s File Save to save this configuration to a file (you choose the name) in a local folder on your PC. This is your primary backup and it will be reloaded every time you start ADMS-11. You can save as many files with as many different configurations as you wish. However, you are now out of sync with the FT3D. What it contains in its memory does not match what’s configured on your PC.
12. Once you’re satisfied with the frequencies and settings in the ADMS-11 application, you need to push this configuration into the FT3D’s memory to get back in sync. This can be done using the custom cable which connects the PC to your radio through a USB port, or by saving your frequency/settings configuration to your pre-formatted SD-Card. This is accomplished by inserting the card into the radio, and uploading the data into the radio using the radio’s import from SD functionality. That’s what we’re about to do.
Keeping the FT3D and your list of frequencies and settings in synchronization you maintain on separate files is always a challenge because you can alter settings on the radio and these are not persisted on the SD-Card or on the PC unless you specifically tell the ADMS-11 software or the radio to do so.
13. In the ADMS-11 software, click Communications | Write data to SDCard… The first time you use this option, a dialog is shown to capture the location of your SD-Card. Subsequently, the ADMS-11 software will default to opening the SD-Card at that location. If this location is no longer available, you will be prompted.
14. If prompted, browse to the SD-card location on your PC and point to the FT3D\Backup folder—after the first time, this will be done automatically. If prompted, enter Backup.dat as the filename. No, you must use this filename—it’s what the radio will look for when it comes time to upload the frequencies and settings. Hit enter to begin the transfer process. Many of these steps are shortcutted after the first time you use the save or load SD options.
At this point, none of the changes you’ve made are reflected in the settings on the FT3D. The SD-card now contains your chosen frequencies and configuration settings.
15. We’re now ready to upload the contents of the SD-Card to the radio. Safely eject the SD-Card from the PC but do not touch the gold contacts.
16. After ensuring that the radio is still off, insert the SD-Card (gold contacts up) into the FT3D SD-Card slot.
PLEASE NOTE THE NEXT STEP WILL ERASE ALL EXISTING SETTINGS AND FREQUENCIES IN THE FT3D WITH NEW FREQUENCIES AND SETTINGS ON THE SD CARD.
17. Once the SD-Card is inserted into the FT3D, Power on the radio. HOLD DISP until the menu appears. Choose SD-CARD, 1 BACKUP, 2 READ FROM SD, select OK and OK again. The radio will display a “wait” dialog while it pushes the contents of the card into the radio’s memory. Once completed, the FT3D will restart with the new frequencies and settings.
Note that if you’re using the custom cable, you have to power up the FT3D with the DISP button depressed to get it to show the upload/download menu with works in conjunction with the ADMS-11 application to reprogram the FT3D.
Once the SD-Card is in place, you can save the current state of the radio to it any number of times using the instructions in step 5. This is also where GPS and photographs taken with the FT3D are stored and subsequently transferred to a PC to access.

You must be logged in to post a comment.